192.168.100.1 - Admin Login
What is the 192.168.100.1 IP
Your wireless router uses a set of two Internet Protocol (IP) addresses. The Internet Service Provider (ISP) assigns the first one. It is the public IP that the router uses to communicate with other networks on the World Wide Web. Each time you request a data package from a website or a web service, the device uses the public IP address to send the request and receive the information you need. 192.168.100.1, on the other hand, is a private IP and is your router’s local address and its default gateway address of the 192.168.100.0 network. It is the device’s address within the boundaries of your home or office network. Your private IP depends on the manufacturer of the device. Typically, wireless routers from the same brand and model, or even across multiple manufacturers, share the same private default private IP. 192.168.100.1, for example, is popular with devices from TP-Link, Asus, and Linksys. Changing your private IP address of your router from 192.168.100.1 to something else is easy. You just have to pick up four sets of numbers between 0 and 255. Doing so will improve the security of your network.
Login at 192.168.100.1
Access your router as Admin
How to Login to your router with IP address 192.168.100.1
Access the Admin Panel at 192.168.100.1
Now you have made sure of two things:
- Your private IP is 192.168.100.1
- You are connected to the right network
You can proceed to open your favorite internet browser. Type the ip address 192.168.100.1 in the address bar and hit “Enter.” You will find yourself at the home page of your Wi-Fi router’s admin panel. Here you will be asked for a username and password to proceed. Like a private IP address, manufacturers assign the same login credentials (username and password) to all devices they produce. They are usually a combination of “admin” for a username and “password” for a password. You can find the default logins for your device on the label at the back of the device. Use them to proceed to the admin menu of your router, where you can personalize and improve your wireless network.
First Step – Secure Your Network
Once you are logged in, you will find a lot of options to tinker. Some of them will sound a little too technical, but that isn’t a cause for worry. The basic settings that concern most users are straightforward to work with. You might want to go to the Network Settings tab and change your local IP address from 192.168.100.1 to a combination of your choice. The reason to do that is to improve your network’s security. Since most routers of the same model share login credentials and 192.168.100.1 as a private IP, they are vulnerable to access from unauthorized individuals. You can easily reduce that risk by assigning a custom private IP to your router. Remember the combination before saving the changes because after you do it, you will not be able to access the router’s settings.
There is another setting that deserves your attention in this submenu. Even if you choose to keep 192.168.100.1 as your network’s local IP address, it is highly recommended that you change the default username and password for accessing the admin panel.
Second Step – Personalize Your Wireless Network
You can go to the Wi-Fi Settings submenu and to change the information in the SSID and password fields you find there. The Service Set Identifier (SSID) is your router’s network name. By default, it will be the brand and the model of the device. That is boring, on the one hand. On the other, you are keeping it as is a security threat. Unauthorized individuals who know the model and make of your device can guess its local IP address is 192.168.100.1. With that knowledge, they get a step closer to breaking into your router’s admin panel and gaining access to your network. Customizing the SSID will eliminate that risk. You can choose anything you like for the name of your network. If you use the router at the office, the name of your company might do the trick. At home, feel free to let your imagination go wild. Don’t forget to set up a password for your 192.168.100.1 Wi-Fi, as well. Thus no one will be able to connect to the routers and use your internet connection without your permission. Pick up a strong password that consists of upper and lower case letters, numbers, and special symbols. If you can’t think of a strong enough combination, just search for a random password generator online and use that.
Third Step – Additional Tweaks and Improvements
Some modern routers have built-in VPN capabilities you can switch on from the admin panel at 192.168.100.1. Using a VPN service is a good idea because it hides your online activity from both websites and hackers. When your router communicates with sites and web services, it uses your ISP-assigned public IP. The address contains some info about your location and other personal data. If you cherish your privacy online, masking your public IP address through VPN is your best course of action.
Another setting you might want to look into while you are in the admin menu of your 192.168.100.1 router is the Wi-Fi frequency. Most commercial routers offer 2.4 Gigahertz and 5 Gigahertz frequencies. You will find the option to change them in the Wi-Fi settings tab. Which one you choose depends on what you use your wireless most of the time. The 2.4 Gigahertz frequency offers a wider range of Wi-Fi networks. Its drawback is that the speed of the connection suffers. The 5 Gigahertz frequency is suitable for connection-heavy activities like video streaming and gaming. On the negative side, it offers a shorter range, meaning the farther your devices are from the router, the more likely it is the speed and stability to suffer.
Once you know how to login, you can then access your wireless router’s settings and adjust them so that you optimize the network you use at home or the office. The process isn’t hard to follow and doesn’t require specialized technical knowledge. Using your router’s private IP - 192.168.100.1 – will help you do that.
The first step whenever you try to adjust your wireless network settings is to check the connection to your router. Make sure that your router is switched on and the Wi-Fi light is on. Then check if you are connected to your router part of the right network. Another thing you might want to double-check is if your private IP is indeed 192.168.100.1. You can easily do that, no matter whether you use a laptop or a mobile device.
Check Your Private IP in Windows 10
The most straightforward way to see if your local IP address is 192.168.100.1 is through the command prompt:
- Go to the search bar in the lower-left corner of your screen.
- Type “Cmd” and choose the Command Prompt app
- Type “ipconfig” in the console and hit enter
- Your private IP address will be listed in the IPv4 field
Check Your Private IP in macOS
To see if your private IP is 192.168.100.1 on your Apple computer:
- Click on the Apple Logo
- Go to System Preferences
- Choose Network
- The network you are connected to should be next to the green light. Click on it.
- Your private IP will be under the “Status” field
Check Your Private IP in Linux
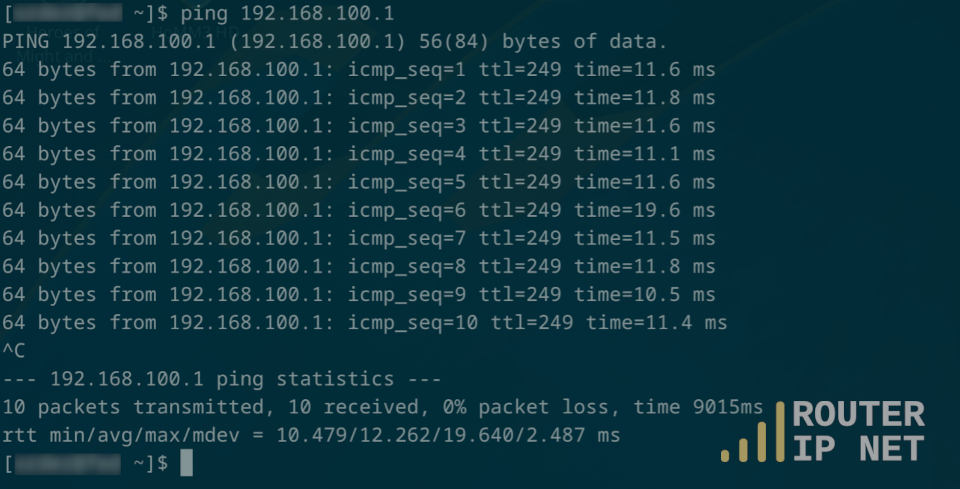
Linux (Ubuntu) becomes more and more popular OS choice every day. If you have a Linux running PC at home or the office, you can check if your assigned IP address is 192.168.100.1 by opening up the Terminal app by clicking Ctrl + Alt + T. Then:
- Type “ip addr find”
- Hit Enter
- Find your private IP the “link/ether” field
Troubleshooting the Most Common Problems with Logging In at 192.168.100.1
It is possible that the page won’t load when you try to connect and to access the router admin panel in your browser. There are two possible reasons for it:
- Your private IP address isn’t 192.168.100.1
- There is a problem with the connection
Bare in mind that you might be typing a misspelled version of the IP of your router. Such misspellings are: 192.168.l00.1, 192.168.l00.l or 192.168.loo.l
You can see if it is the first case by checking your private IP using a method depending on your Operating System. If you confirm that 192.168.100.1 is the private IP your router uses, check the connection. See if you are logged in to the right network and restart the router. The safest way to do that is by leaving it unplugged for a couple of minutes and then switching it back on. You might want to consider connecting your laptop or PC directly to the router using an Ethernet cable. The cable ensures a more reliable connection and should eliminate the problem of not being able to reach the home page at 192.168.100.1.
Another common issue is that the username and password by default from the label at the back of the router don’t work. That happens when you have bought the device secondhand, and the previous owner has changed the settings already. Or if you have had your Internet Service Provider set up the network and they have made the changes. Try calling them to see if they can tell you what the logins (username and password) are. Alternatively, you can factory reset your 192.168.100.1 router by pressing the reset button at the back of the device for half a minute. Note that factory resetting the device will wipe out all previous changes made to the network’s settings.