10.0.0.1 - Admin Login
What is the 10.0.0.1 IP
The wireless router you use at home or in your office has two distinct IP addresses. It is part of the public Internet Protocol (IP), acting as a point of communication with other devices and networks across the internet. The purpose of the private IP is to build your personal network. 10.0.0.1 is the private IP address that the manufacturer has assigned by default to your router. The public IP is assigned by your Internet Service Provider (ISP).
All IPs follow the 32-bit pattern of four numbers between 0 and 255. You can change your private IP from 10.0.0.1 to anything you like if you access the router’s admin panel. There, you will find a host of other settings you can adjust to personalize your wireless network and make it run better and in a more secure fashion.
Login at 10.0.0.1
Access your router as Admin
How to Login to your router with IP address 10.0.0.1
First, make sure that your wireless network is up and running. Everything should be okay if the Wi-Fi light on the router is on. Next, consider connecting your laptop or PC to the 10.0.0.1 router directly via an Ethernet cable to ensure an uninterrupted connection. The next step will be to open a browser app of your choice – Chrome, Mozilla, Edge, and Safari will all do the trick. Next, go to the address bar and type 10.0.0.1. Hitting Enter will load the home screen of your wireless router’s admin panel.
Accessing the Admin Panel
You will be prompted to enter a username and password to go on. Don’t worry if you don’t know them. These should be the basic logins that the manufacturer assigns to every device from a specific model in the factory. There are three places you can find those:
- The faster way to find the default username and password of your 10.0.0.1 wireless router is to look at the label on the back of the device itself. The logins should be listed next to the 10.0.0.1 private IP.
- The manual that came in the box with your wireless router, if you’ve got it brand new.
- The manufacturer’s website. All you will need to do is go to the Support section of their website and look for the model of your 10.0.0.1 router.
Enter the username and password and hit Enter. Congratulations, you have found yourself in the admin panel of your 10.0.0.1 wireless router!
The Relationship between 10.0.0.1 and Your Internet-Capable Devices
Let’s say you use your smartphone, laptop, and tablet to check your email, stream video content, and browse the internet. The first device you connect to the Wi-Fi reaches out to the router at the private IP address. The router assigns said device an IP based on 10.0.0.1 – in this case, it will be 10.0.0.2. The second device you connect will get the 10.0.0.3 private IP, the third one 10.0.0.4, etc. The devices send requests for data packages to the 10.0.0.1 IP, and the router redirects them to the relevant internet service or website using its ISP-assigned IP. The router receives the data packages to the public IP and then uses the private IP to distribute them to the right devices. You can think of both the 10.0.0.1 and the public IP as PO Boxes that take part in distributing data across the Internet and your wireless network.
Possible Problems and Troubleshooting Solutions
The logging-in stage of adjusting the settings of your routing device comes with two possible problems. In one scenario, when you try to access the admin site at 10.0.0.1, the browser will return an error message. If that happens:
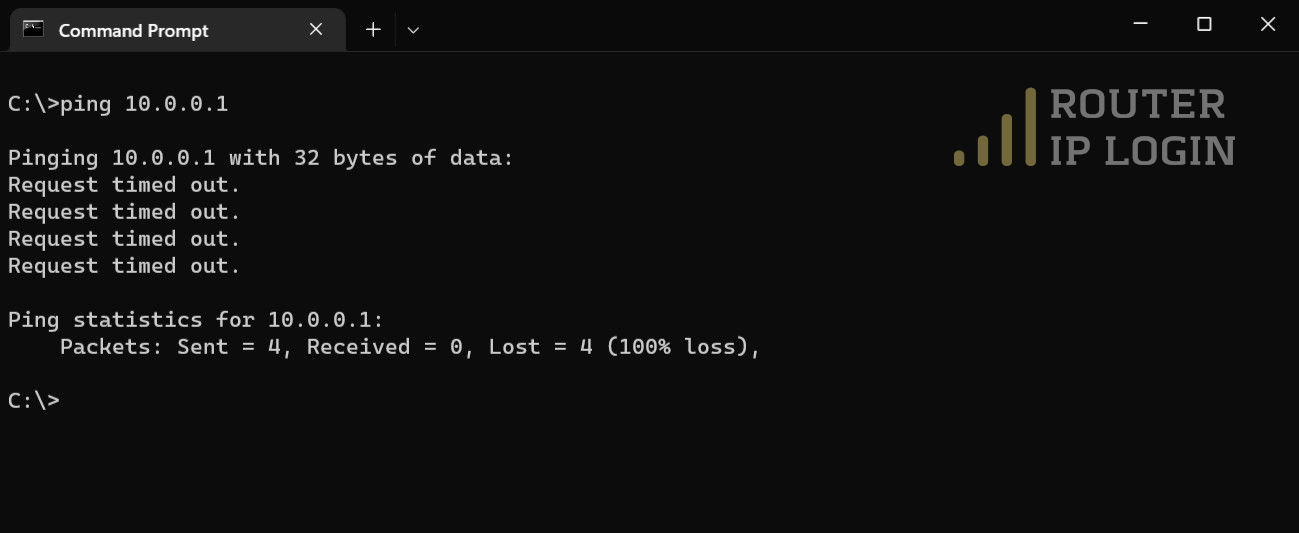
- Make sure your device’s private IP address is indeed 10.0.0.1. Go to the Command Prompt app in your Windows 10, type “ipconfig” and hit Enter. The private IP will be listed next to “IPv4”. If you are using a Mac, click on the Apple icon, go to Network Settings and choose the network you are currently connected to. If your private IP is 10.0.0.1, it will be listed there.
- When you confirm your private IP, make sure that the router is up and running. You should plug in the internet cable, and the Power, LAN, and Wi-Fi lights on the device should be on.
- Try restarting the router. Plug it off the cord, leave it for a couple of minutes, and plug it back on.
- Connect to the Wi-Fi again. Alternatively, consider using an Ethernet cable connection between the router and your computer.
Another issue you can run into is that the default username and password you’ve found don’t work. Typically that happens for one of two reasons:
- Your Internet Service Provider (ISP) has changed them while setting up the wireless network at your home or office.
- If you bought your 10.0.0.1 router secondhand, the previous owner might have tinkered with its settings and changed the default logins.
In both cases, you can try calling the concerned party (ISP or previous owner) and ask them for the correct logins. If you can’t do that or don’t want to, you can use the last-resort solution – factory resetting your 10.0.0.1 wireless router.
Factory Resetting Your 10.0.0.1 Wireless Router
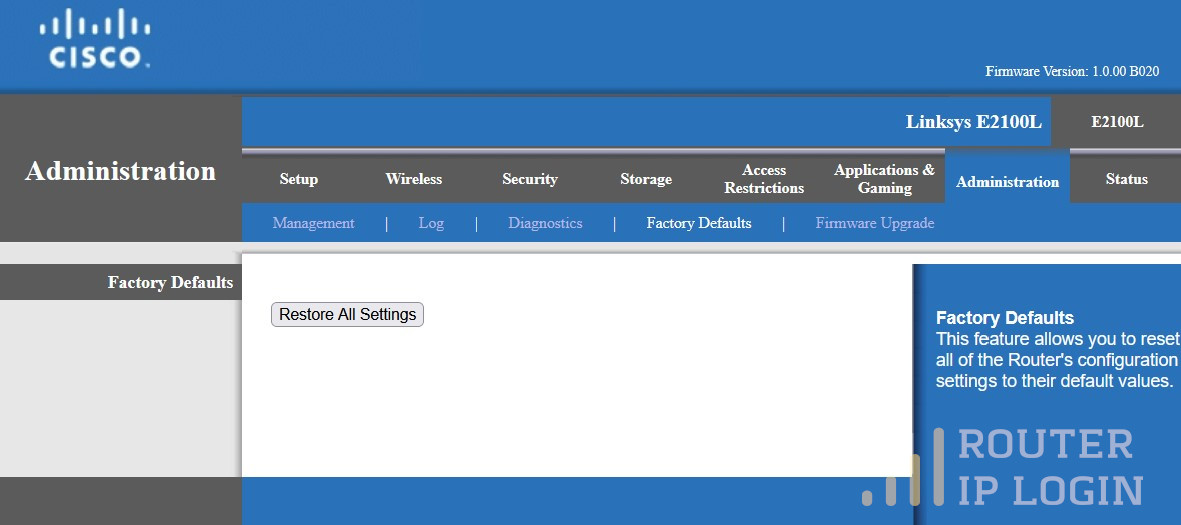
Before you go for the factory reset, remember that the process wipes out all customized settings from the device. That includes Wi-Fi name and password. The process will return the router’s username and password to factory defaults.
To factory reset your 10.0.0.1 wireless router:
- Locate the Reset button located on the back of the device.
- Without switching off the router, press the Reset button (you might need a pin) for fifteen seconds straight. You will notice the Wi-Fi, LAN, and Power lights start blinking, then switch off.
- Release the Reset button and wait for the router to boot back up.
Connect to the Wi-Fi (or use an Ethernet cable) and go to the 10.0.0.1 page in your browser. Use the default username and password to access your device’s admin panel.
Setting Up Your Wireless Network
The main menu of your 10.0.0.1 router is usually on the left side of your screen. It can also be located in the header, depending on the brand and model of the device. The first place you’d like to go from there is the Wireless Settings tab. Click on it. Here you will find several fields that might potentially interest you:
- SSID (Service Set Identifier) – this is the name of your wireless network. Choose any name you fancy (as long as it is not offensive) and save the changes.
- Password – that is the password each user who tries to connect to your Wi-Fi has to know. The best passwords are at least 12 characters long and combine upper and lower case letters, numbers, and symbols.
- Frequency – modern routers offer 2.4Ghrtz and 5Ghrtz signals. Which one you choose on whether you want your 10.0.0.1 wireless network to cover a wider range (at the expense of potentially lower speed), or you’d like it to be faster (but covering less room). In the first case, choose 2.4Ghrz. In the latter, go for the 5Ghrtz frequency.
Improving Your Wireless Network’s Security
The next stop is the Network Settings tab. Two main things concern you there. First, you might want to change the default username and password that you have used to log into your router at 10.0.0.1. Second, you might want to consider changing the router’s private IP itself from 10.0.0.1 to something else. Both actions will significantly increase the security of your wireless network by preventing unauthorized individuals from accessing your router’s settings.
Hide Your Online Activity
10.0.0.1 is your private IP which the router uses to communicate with the internet-capable devices you connect to your Wi-Fi network. It uses the public IP to communicate with devices and services outside your network. In contrast to 10.0.0.1, you cannot change the ISP-assigned public IP. That address contains information about your location and other sensitive personal data. Logically, you’d like to protect your personal data from hackers and other malicious parties across the World Wide Web. Fortunately, many modern routers come with a built-in VPN function. The VPN hides your online activity from websites, services, and apps. You can enable the built-in VPN from the 10.0.0.1 admin panel.
Parental Control
Now that you have set up the basic features of your wireless networks, you can devote some time to exploring the other options your 10.0.0.1 router provides you with. The parental control function is a popular one because it allows you to establish limits as to the sites users can access from your network. You can even restrict certain devices from accessing these sites and services. You will have to enter the unique MAC address of the device you’d like to restrict uses to identify itself on the network. You can learn the MAC address from the same place in the Windows Command Prompt you have checked your private IP earlier (type “ipconfig”). Other parental control functions include time limits for each device or setting up a time-frame during which the internet access will be limited (for example, after bed-time or when your children need to do their homework).